Chapter 16
Fertilizing Your Tomatoes
Good soil preparation is basic, and without it your chances of growing a big tomato are greatly reduced. Review the chapter on soil preparation. What is presented here is what you should do in addition to soil preparation, and not instead of it.
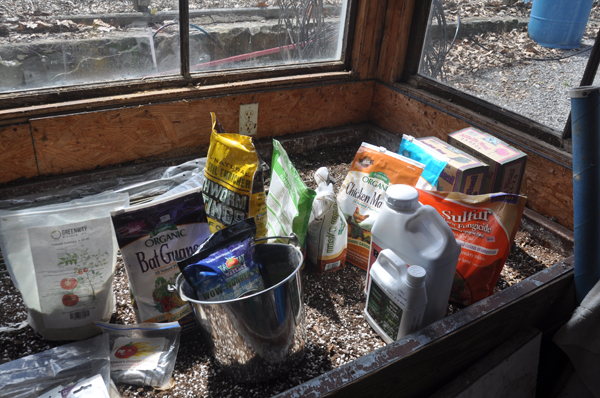
Once your tomatoes have been planted, there are numerous ways you may fertilize them throughout the growing season. Some growers like to grow organically, while others use chemical fertilizers freely while still many others are somewhere in between. Plants may be fertilized using foliar applications, by drenching, by placing mineral fertilizers on the soil surface around the plant, or by using some combination of all three. Tomatoes do best with low nitrogen fertilizers. Excessive amounts of nitrogen will result in huge plants with few tomatoes. Most of the nutrients required by your tomato plants should already be present in the soil at the time you plant if you did proper soil preparation.
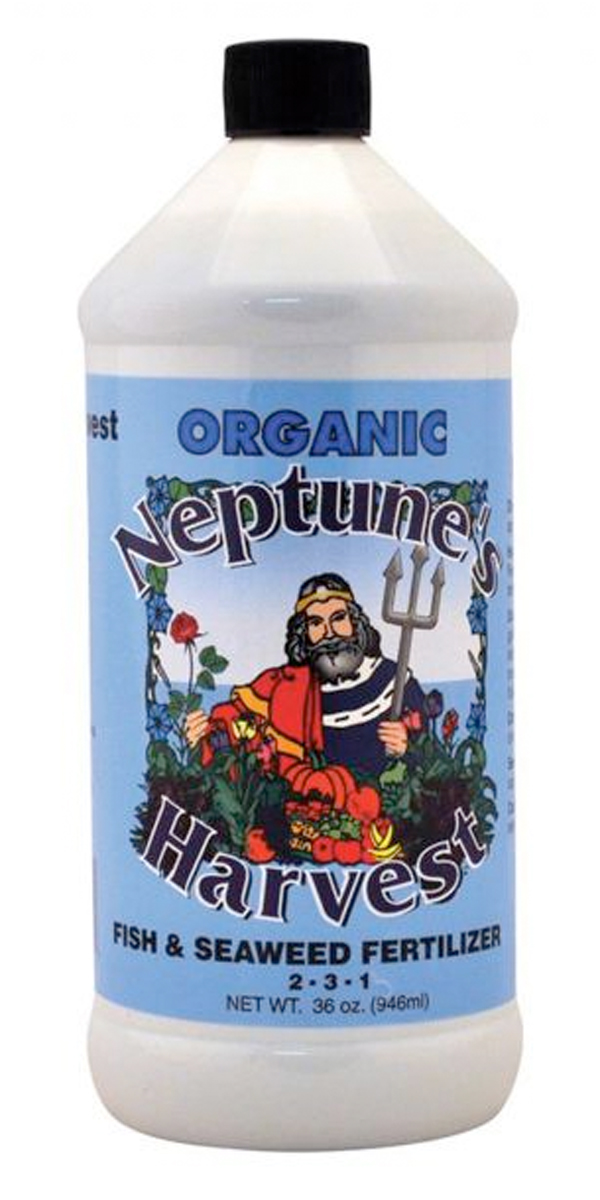
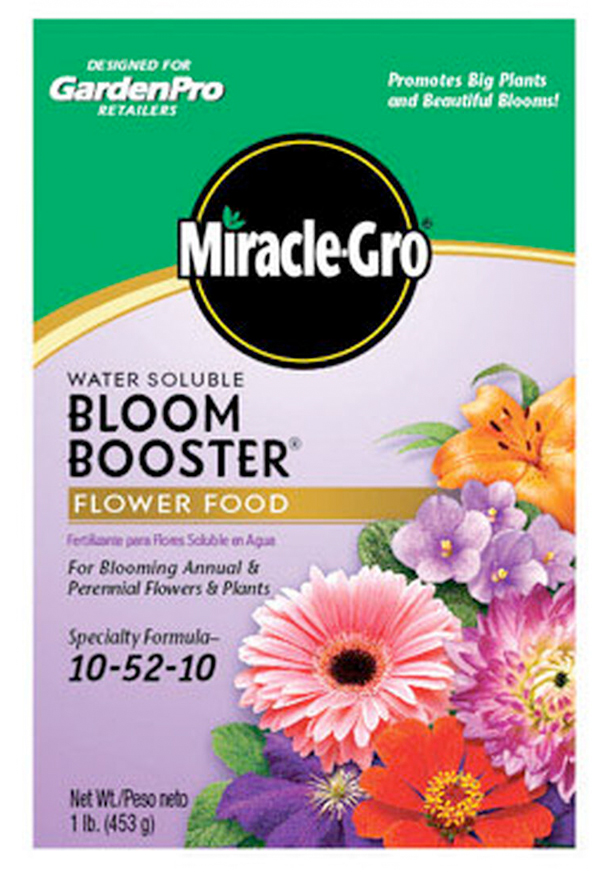
However, big tomatoes have big appetites. Additional fertilization using a biweekly foliar feeding of a fish/seaweed emulsion (2-3-1) throughout the growing season is recommended. In addition, when first planted, tomato plants require additional phosphorus primarily for root growth. Until you see blossoms forming, give weekly foliar feedings with Miracle-Gro Blossom Booster (10-52-10) for phosphorus. After the fruits have formed, they require additional potassium and something higher in potassium should be substituted for the high phosphorus material as a weekly foliar feeding or plant drenching at half to one-quarter strength. Throughout their growth, tomatoes need nitrogen but in limited amounts. A heavy application of nitrogen to tomato plants will produce vigorous vine growth but will not have any positive effect on fruit production and may actually take away from it. Avoid any high nitrogen fertilizer.
Foliar sprays are most effective when dew is on the leaves, so spraying should be done early in the morning. Spraying may also be done in the late afternoon or early evening, although getting the leaves wet at that time of the day, and leaving them damp throughout the night, may predispose the plant to fungal infections. Some growers prefer to foliar feed on overcast or foggy days, but this is not always possible since these conditions may not present themselves. Keep in mind that plants will not absorb minerals very well through their leaves during the heat of the day or at times of bright sunlight.
Sample Foliar Feeding Program
| Period | Biweekly | Weekly |
|---|---|---|
| From planting until tomatoes form | Fish/seaweed emulsion (2-3-1) |
Miracle Gro Blossom Booster (10-52-10) |
| After tomatoes form | Fish/seaweed emulsion (2-3-1) |
Miracle Grow All Purpose Liquid Fertilizer (12-4-8) |
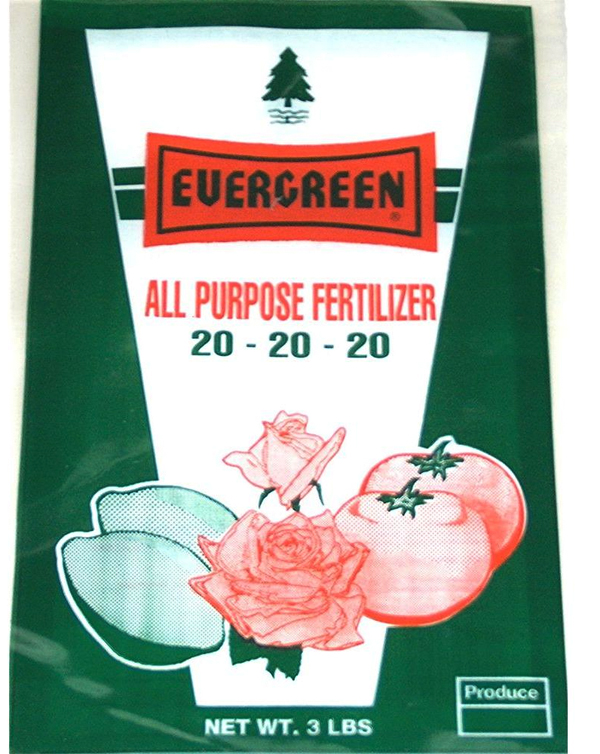

If you do not want to foliar feed, another routine that has met with some success is the application of 20-20-20 granular fertilizer at the rate of one tablespoon weekly to the soil at the base of the plant, being careful not to get it on the plant, until the blossoms begin to form. After the blossoms have formed, switch to one tablespoon of 5-10-40 granular fertilizer, rotated weekly with 20-20-20 applied to the base of the plant through the remainder of the growing season. After the fruit has set, add to this a foliar spray of a fish/seaweed emulsion, with some calcium added, once or twice weekly.
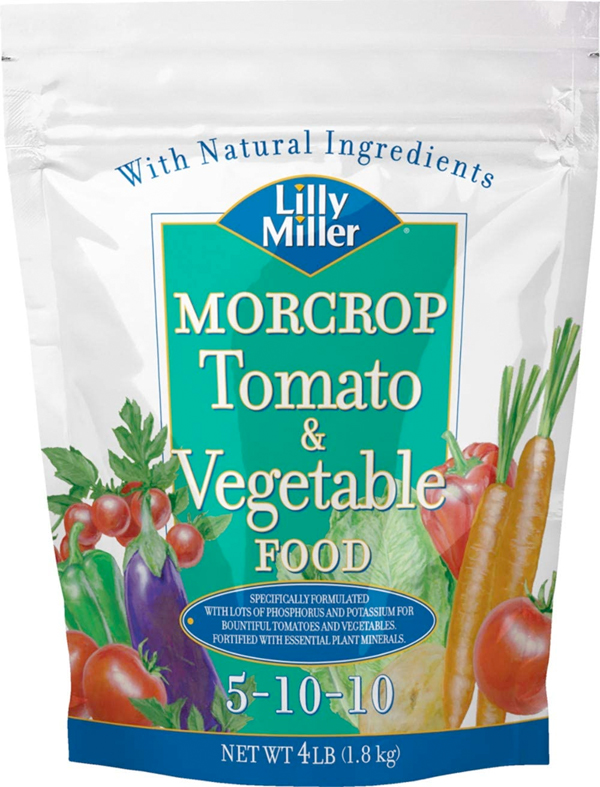
Still another option is to give your plants a liquid fertilizer (like liquid kelp) at half strength with every watering. Once a month, add a tablespoon of 5-10-10 granular fertilizer at the base of the plant, or a drench using a high potassium water soluble fertilizer. Just keep in mind that before the tomatoes have set it is better to use a fertilizer higher in phosphorus and after they set one higher in potassium and never anything high in nitrogen.
Growers Comments on Fertilizing

"I foliar feed every week. In addition, I use liquid kelp and a high phosphorus solution at the roots every week, using 1 gallon of solution per week per plant while they are small. Later I increase that to 3 gallons per week, taking into consideration rain or the lack of it. In addition, I granular feed with 5-10-10 or a mix especially for tomatoes, until I have the fruit I want, then I use something that is high in potassium. I also use generous amounts of ground egg shells. This is very good for preventing blossom end rot. Later in the season, I use extra potassium and cut back on the watering a little to help prevent blotchy ripening which is very common, and I continue to foliar feed alternating with the liquid fish and kelp." Minnie Z.
"I start with water soluble 10-52-10 fertilizer, then after the fruit has some size to it, I switch to water soluble 18-19-30 and an alfalfa tea mixture, along with foliar feeding with seaweed. I fertilize weekly unless there is a lot of rain. An aqua cone water spike, which is a 2 liter open bottle that feeds the roots slowly, is set next to the plants that I think have the most potential. I fill them daily." Ron K.

"I use a modified foliar system using household products, Peter's Plant Food (with analysis of 10-50-10, 20-20-20, 24-12-12) and Miracle-Gro 15-30-15 and Miracle-Gro for Tomatoes, and ENP's Age Old Organics 5-10-40 soluble plant food. I apply these depending on growth stages. For example, I use 10-50-10 at transplanting. Other products I use are liquid iron, liquid copper, Borax, epsom salts, green and black tea, Pepsi Cola, chelated zinc, vitamin B12, B-complex, feed molasses, Alaska fish fertilizer, liquid kelp, compost, compost tea, goose and duck manure, horse manure, 12% chelated liquid calcium, and others. I apply it at the time it is needed and at the stage of growth that is right. I apply high phosphorous at transplant for up to two weeks, 24-12-12 for about a month, then 10-50-10 again until first bloom. Then I use a combination of of 24-12-12, 20-20-20, and 10-50-10 to gradually change the formula over to a higher potassium content until it's mostly just 5-10-40. I foliar feed under and over leaves and stems every day with a light spray until it rolls off the leaves and fruit. I foliar feed either very early morning or near dark, or anytime on a damp, foggy day when the stomas are more likely to be open. I don't use any granular fertilizers unless my soil test calls for it. I had good luck this year with this program and will use it and modify as I learn. I am also going to experiment with music and frequencies of sound, and create a journal of observations. Sounds contribute to opening stomas and receiving nutrients. I believe that the most important soil additive is homemade compost. I will also use a mycorrhizae fungi blend on my tomatoes this year." Don C.
"I do not feed tomato plants growing in soil or raised beds until I am sure that the first truss has been pollinated successfully. The plant's root should be developed by this time and ready and waiting for the first treatment." Bernard L.
The Basic Four
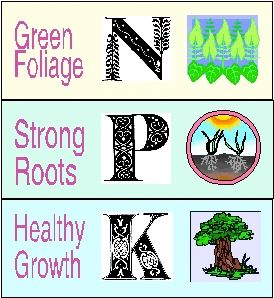
Nitrogen (N), phosphorus (P), and potassium (K), along with calcium (Ca), are the four most important elements needed by tomato plants.
Nitrogen is essential to leaf and stem growth. Good sources of nitrogen include manure, compost, blood meal, alfalfa meal, and fish emulsion. Too much nitrogen results in big leafy tomato plants with little or no fruit. Leaves will be dark green and the stems thick. Too little nitrogen results in pale or yellow leaves and stunted growth. Nitrogen exists in the soil only as a byproduct of the soil microbial life, rather than as part of the earth's mineral store of nutrients. 99% of the total soil nitrogen is in the organic matter in the soil, both living and dead. 1% is in the soluble inorganic forms found in chemical fertilizers.
Phosphorus promotes the growth of strong roots and the production of flowers, fruits, and seeds. Sources of phosphorous include bone meal, phosphate rock, and manure. Small dull leaves with yellow streaked margins and purplish appearance on the underside are indications of phosphorus deficiency– as is poor root growth.
Potassium is essential for fruit development, growth, and disease resistance. It is available in wood ashes, greensand, kelp meal, and manure. Too little potassium results in stunted plants and poor yields. The fruit will feel soft. The leaves may appear spotted, mottled, and curled with scorched leaf margins.
Calcium is needed for the development of cell walls. Insufficient amounts result in blossom end rot. Leaves may appear curled or scalloped. Roots will appear stunted. Calcium sources include gypsum, bone meal, crushed eggshells, and limestone.
Foliar Feeding and Chelated Micronutrients
Foliar feeding is a technique of feeding plants by applying liquid fertilizer directly to their leaves. It has been known for many years that plants are able to absorb essential elements through their leaves. The absorption takes place through the stomata of the leaves and also through the epidermis. Movement of elements is usually faster through the stomata, but the total absorption may be as great through the epidermis.
A common version of foliar feeding is the use of sea-based nutrient mixes, especially kelp, because kelp contains many of the fifty trace nutrients known to be needed by plants. Kelp also contains some hormones considered to be good for the cellular development of the plants leaves, flowers, and fruit.
Plants need nitrogen, phosphorus and potassium, the N-P-K on fertilizer labels, in large amounts, and so these have been referred to as macronutrients. NPK are needed in much larger amounts than the micronutrients. While nitrogen, phosphorus and potassium are all mobile in the plant, it is unrealistic to apply NPK to foliage as the leaves alone simply cannot take up enough material to supply the entire plant's demands. Also, an attempt at foliar application in high concentrations of such nutrients can result in leaf burn as the water they are dissolved in evaporates and the fertilizer salts remain behind. Macronutrients are best provided to plants by the use of various soil applications of either chemical or organic chemical fertilizers including some of those that have been chelated.


Plants also need what have been labeled the essential micronutrients (also known as trace minerals) such as zinc, magnesium, iron and manganese. Thus far there are 50 identified essential micronutrients which come in many different forms with varying water solubility that affects their uptake and ultimate usage by plants. A micronutrient that is not in a water soluble form cannot be taken up by a plant.
Micronutrients commonly react with other chemicals in the soil and become "locked up" or precipitate. Once this happens, these micronutrients are insoluble in water and so will not be absorbed or used by the plant, at least not until micro-organisms or weather breaks them down into a usable form. So, you could literally add a large amount of a given micronutrient to the soil though the plant might be able to actually use only a small amount of it. A good example of this phenomenon can be seen with the mineral, gypsum. Every year growers apply gypsum (calcium sulphate) to their fields in large amounts, but since calcium sulfphate is not very soluble in water, only a very small amount of calcium is available to the plant. It takes a long time for soil microbes and weather to break such compounds down so that they are in a form that plants can absorb. Foliar applications of water soluble micronutrients do not suffer from this phenomenon and are readily absorbed.
Fertilizer manufacturers produce micronutrients in several different forms such as salts, oxides and chelates. The chelated micronutrients are becoming more and more popular because of their high efficiency due to their water solubility and the fact that they are considered to be organic. Farmers and home gardeners are constantly looking for products that will improve the output of their gardens. And, especially so if these products are organic. Knowing more about the various types of chelated micronutrients available can help you choose one that is right for you.
To begin with, chelation is a term that describes an encapsulation process. A mineral, like calcium, reacts with another material to form a protective shell around the desired mineral (in this example, calcium). The word chelate derives from the Greek word "chel", meaning a crab's claw, and refers to the pincer-like manner in which the mineral is bound. Some chelating chemicals are shaped like a letter 'C' and surround the mineral with just one molecule. This type of binding is called a "complex". When two molecules of the same material surround a mineral it is known as a chelate. It is important to note that some minerals, like boron or molybdenum, have only one chemical bond and are thus limited to forming only a complex. Strictly speaking, boron and molybdenum cannot be chelated minerals even though they are often presented and sold in the market as chelated minerals.
Chelates need a "glue" to hold the protective shell in place. Some chelates use sodium for this purpose, but adding sodium can be detrimental to plants. In general the amino acid chelates use organic acids like citric acid. There is an important distinction to be made here about the use of the word organic. In chemistry the term organic means the material contains carbon. In the organic foods world the term organic refers to foods produced without pesticides, synthetic substances, or sewage products.
Chelates are molecules with a neutral charge, which is very important. Micronutrients normally have an electrical charge on them. For example, calcium and magnesium are both +2 charge. Soil is generally negative in charge, especially clay soils. This means that calcium and magnesium will likely react with the soil and form insoluble compounds which are insoluble and not available for plants to use. Moreover, since they are the same charge, calcium and magnesium compete with each other for entry into the plant. Pores on the leaves of plants (also known as stomates) are negatively charged, so positively charged molecules trying to penetrate the plant get tied up at the stomate entrance thus slowing absorption. But the interaction with chelates is very different. The neutral charge of chelated minerals allows them to enter the stomates without difficulty.
There are several types of chelates. One of the most common forms is Ethylene Diamine Tetra Acetic Acid (EDTA), which has been on the market for years. EDTA is a large synthetic molecule that binds very tightly to minerals and resists chemical interactions which is a desirable characteristics for chelates to be used in the soil. But this strong bonding characteristic can be a negative attribute once EDTA is in the plant. EDTA binds tightly. In addition, EDTA can solve one plant nutrient deficiency and at the same time cause another. EDTA has something of a separation anxiety; it must always hold on to something. For example, iron EDTA will cure iron deficiency in plants, but in order for the EDTA to release the iron it must hold onto something else. Often EDTA will take up manganese in order to release the iron, thus causing a manganese deficiency. Furthermore, EDTA is known to take calcium from cell walls in both plants. Plants losing calcium in this manner (primarily from their cell walls) visually manifest the loss as wilting. And so EDTA chelates are most effective when applied directly to the soil but not as effective when applied to the leaves of a plant.

Another category of chelate is the amino acid chelates. Amino acids are the building blocks of protein. Amino acids are moderately strong chelating agents. Once inside the plant the mineral is released and the left over amino acids that formed the protective shell are used by the plant as a source of water soluble nitrogen. After all, amino acids are building blocks in cell machinery. Everything is used, nothing is lost. Amino acid chelates move and travel to where they are needed. They can do this because amino acids are recognized by the plant as building blocks and are used in nearly every tissue in the plant. Amino acid chelates are available as liquids or powders and generally available for use in organic food production. Glycine chelates (also known as glycinates) are a subset of amino acid chelates. Glycine is the smallest amino acid and it is often used as a chelating agent. Since glycine is small it makes a small final product that passes through leaf pores (stomates) more easily than other larger molecules, thus enhancing plant uptake. Because chelates enter the plant easily they are extremely useful for quickly correcting nutrient deficiencies.
As a rule chelates are very safe for the plant. Amino acid chelates are especially suitable for greenhouse and hydroponics systems because they are usually certified organic, readily available for uptake by plants by both roots and foliage and generally are not toxic to the plant.
Suggestions for Foliar Feeding are as Follows
The best time to foliar feed is after 5:00 P.M and before it is totally dark. At these times the stomata, small opening on the underside of the leaves that can take in water and nutrients, are open. The ideal air temperature is 60 to 72F. If the air temperature is 80F or more, do not bother to spray as you will get little effect. The foliage will most likely be dry with water vapor leaving the cells rapidly such that there will be little chance of foliage-applied material being absorbed. The added moisture of the spray will evaporate quickly and the dry salts will be easily removed by air movement. For these reasons, the application of foliage sprays should be made at times when the humidity is high - between 5 P.M. and 8 A.M., or on cloudy, drizzly days. . Foliar solutions should not be applied if the plants are wilting or under water/osmotic stress as the plants stomata are likely to be closed making application ineffective.
Wetting agents tend to improve the response to foliage sprays. The use of a good quality, nonionic wetting or sticking agent is vital for foliar feeding. Wetting agents are necessary to ensure the adherence of droplets on the leaves as well as assisting with the absorption of the fertilizer solution into the plant tissue.
The foliar fertilizer solution should be applied as a fine mist until it drips from the leaves so that the entire leaf surface is wetted. It is better to spray small amounts of material more frequently than it is to drench large amounts of material. Foliar feeding can by carried out on a regular, weekly basis.
Foliar feeding is to make up for deficiencies in your soil and specifically micronutrients and trace minerals. If your soil was perfect, foliar feeding would be unnecessary.
Tarping
Using a tarp to prevent the leeching of water soluble nutrients from your soil is something very few growers do. But, all it requires is a tarp and some weight to hold it down. The goal is to prevent fall, winter and spring rains from washing out the water soluble nutrients you have added to your soil. Usually tarps have been used to prevent unwanted vegetation in your garden. But not here. Killing weeds is not our goal. Preventing leeching is.
A woven tarp or a plastic tarp can be purchased at your local convenience store or online. They are not expensive. You can order one that is the right size for your garden plot. The choice is essentially between woven poly tarps and plastic tarps. The woven tarps are built to handle more sun exposure and last longer but they cost more.
Whatever tarp you use, you want it to be dark! The dark blocks out the light and so you will be getting rid of unwanted vegetation as well as preventing nutrients from leeching out. As for weights, you could us a wide variety of objects to weigh down a tarp but I used some old boards. You could use blocks, pieces of wood or whatever.
The tarp should be put down right after you have added your fall nutrients. The longest amount of time it is recommended to leave a tarp on is from fall to spring. Too long on the ground and it will start to kill off the organisms that live in the soil.
When you take your tarp off in the spring, the soil will be warm and dry and ready to work.