Chapter 4
Preparing Your Soil
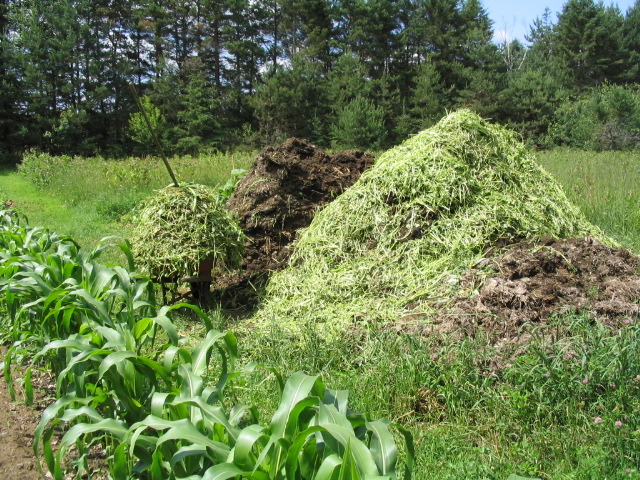
Soil preparation begins in the fall, and is finalized in the spring at planting time. In the fall, organic matter is added to the soil to replace that which has been broken down by soil organisms and utilized by the plants during the preceding growing season. The value of organic matter is widely known and indisputable. Besides providing plant nutrients, as it is broken down by soil organisms, organic matter tends to hold nutrients in the soil which are then made available to the plants. It also helps retain moisture in the soil, allows oxygen to reach the roots of the plants, and assists in buffering the pH of the soil. Organic matter is one of the keys to growing a big tomato, or for that matter, any tomatoes at all.
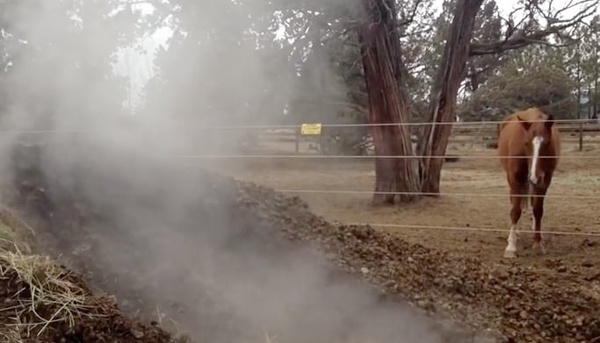
Organic matter can be added to the garden in the fall in the form of fresh horse or cow manure, composted horse or cow manure, composted leaves, composted yard waste, or chopped leaves. After the organic matter is spread over the garden at least 2, and up to as much as 8 inches thick, it is tilled in and the garden is put to rest for the winter.
Some growers spray their garden with a molasses mixture (1 to 4 ounces per gallon of water) after adding organic material, to stimulate bacterial growth. As a final step, you may also choose to cover the growing area with clear or black plastic held down by stones or pieces of wood through the winter. When the soil is uncovered in the spring it, will be warm and dry and ready for digging your planting holes.
Some growers plant annual rye in the fall, mow it in the spring, let it dry a bit and then till it in. This adds organic material and some nitrogen to the garden. Cover crops, which grow by scavenging the depths of the soil for nutrients, concentrate all that goodness in the top few inches of the soil when we turn them under.

A soil test is worthwhile if you know nothing about your soil's nutritional status or pH. The pH of the soil should be around 6.5 (6.2 to 6.8). A soil test can be done either in the fall or spring.

In the spring, soil preparation is usually directed toward the development of planting holes for the tomatoes. These holes should be at least 18 inches deep and 24 inches wide and 36 to 48 inches apart. The holes are filled halfway with a mixture of composted leaves mixed with composted manure (half and half), to which has been added a tablespoon of Epsom salts, and a tablespoon of gypsum (a calcium source). This can be mixed together in a 5 gallon bucket and then poured into the planting hole. The hole is then filled the rest of the way with soil. Some consideration could also be given to adding some humic acid and mycorrhizae.

The Planting Hole
Lots of tomato growers prepare what they call a planting hole into which they will place their 6 to 8 week old tomato plants that are awaiting placement in the garden. There are many ways to go about this and some gardeners choose to not even use a planting hole, preferring to simply add whatever directly to the soil in which the new plant will reside. This pretty much depends on how well the garden has been prepared. If you tilled your garden in the fall and added compost or manure or whatever at the time, then maybe you don't need to dig and prepare a hole in which to plant. You may choose to simply put the additives on top of the soil and mix them in where the tomato will be placed. Or you may choose to add nothing at all.
For those who feel the need for an actual planting hole, here is a plan. Dig a hole in your garden 24 inches across and 18 inches deep. Fill a 5 gallon bucket half full with either yard compost or composted manure. (You can buy this at your local gardening store or make it yourself.) Fill the bucket until it is 4/5 full using the upper layer of soil removed from the hole you are preparing. The remainder of the soil you remove from the hole can be spread around the garden. To the 5 gallon bucket then, add the following and mix it in well:
Product |
Amount |
|---|---|
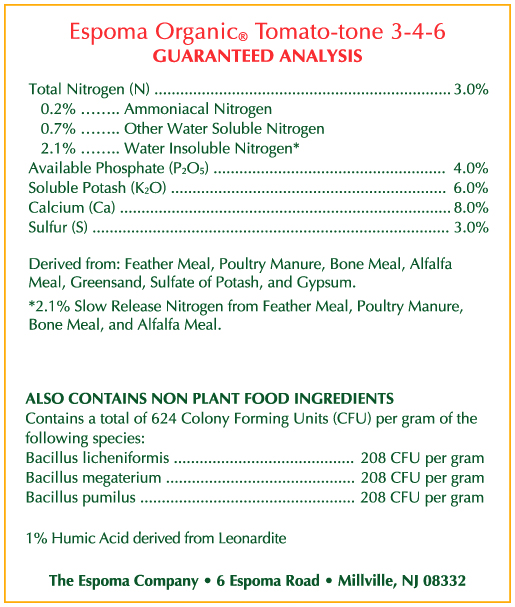
| Tomato-tone | 1 cup |
| Gypsum (calcium sulphate) | 1 tbl. |
| Miracle-Grow Bloombuster (10-52-10) | 1 tbl. |
| Epsom salts (magnesium sulphate) | 1 tbl. |
| Mycorrhizae | (see manufacturer) |
Empty the bucket into your planting hole and later put your tomato plant in as well. At the time of planting, water the new plant in with 1 gallon of water containing 2 tablespoons of Neptune's Harvest.
There are several other ways to prepare the planting area in the spring if it did not get done in the fall. Some growers double, or even triple, dig their garden by hand since it is best that the soil for tomatoes be prepared to a depth of at least 12 to 24 inches. Some prefer growing their tomatoes in raised beds, and in that way they avoid some of the digging, particularly where the layer of topsoil is thin. The soil in raised beds warms up a bit earlier in the growing season thus awakening the soil bacteria. Also, raised beds have better drainage and can be used in areas that tend to be moist.

Earl's Hole Method for Growing Tomatoes
A grower in Ohio by the name of Earl Cadenhead is well known in the Tomato Growing Forum and elsewhere and many are much enamored with his system for growing tomatoes. Below is one of his internet posts regarding his method of growing tomatoes:
"Items required can be purchased from a Walmart type garden center and are as follows: 40 lb. bags of Composted Peat Humus, 40 lb. bags of Composted Cow Manure, Epson Salts, Bonemeal and Espoma Tomato-tone® 4-7-10 fertilizer or equivalent. In raised beds, after tilling, I dig good sized holes about 2 feet across, scattering the soil around the hole. Then to each hole I add ½ bag of the peat humus, 1/4 bag of the manure, then I scatter about the hole a handful each of Epson salts, Bonemeal and Espoma. Then I use a spade fork to mix the formula VERY well some inches beyond the depth and width of the original hole."
"If the plants are indeterminate they should be planted at least 4 feet apart. I then, using my hands, I make a hole in the center of this mixture and plant the seedlings. If the seedlings are tall I strip off the leaves except for the top few inches, and lay it at an angle or on its side in the hole and cover up to the leaves. Then I form a 4 inch deep water holding basin [a crater] about 1 1/2 feet across and around the plant, then mulch the plants and bed with straw or grass clippings, then water. Last I spread a handful of granular fertilizer such as Espoma Tomato-tone® 3-4-6 on top of the mulch around the plants so it will leach into soil over time and feed the outer roots for they grow wide and deep."
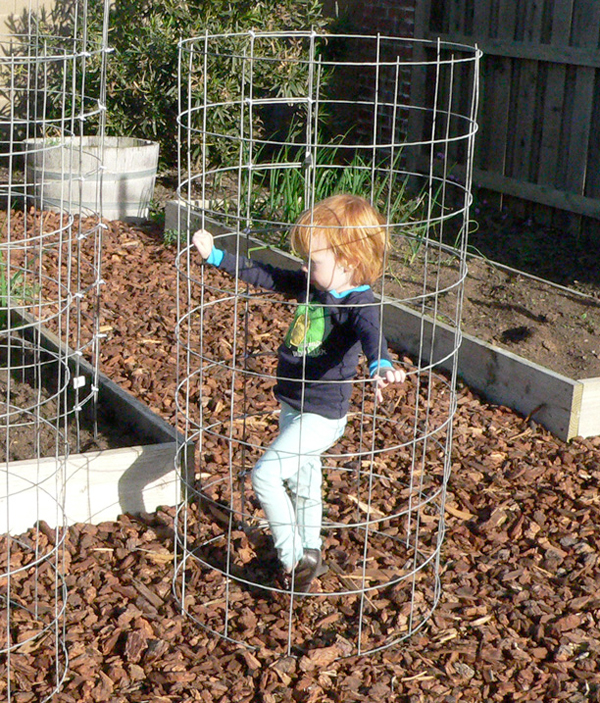
"I use concrete wire cages 18-20 inches across and anchor them with rebar driven deep next to the cage. When I have to water, if I don't get rain in 7-10 days, I stick an open ended hose at the base of the plants and give them a couple gallons."
"Never over water. The plant's leaves will tell you they're thirsty by drooping a bit. As the plants grow, to help prevent leaf disease, trim any branches that droop and touch the mulch. During late summer if I think they need it I'll give each plant a couple gallons of fish emulsion or whatever liquid type I have. And if you have leaf problems, get started early using Daconil as soon as you plant, even saturate the mulch around the base as well as top and bottom of leaves. I can't say this is the best way to do it, but it works for me." — Earl Cadenhead
Grower Comments on Soil Preparation
"My fall preparation ingredients consist of manure and maple leaves. Ideally, I spread 2 to 4 inches of manure and a lot of maple leaves. My son and I will drive around the neighborhood and collect bags of leaves; then dump them in the yard next to the garden so I can grind then up with the lawnmower. From here, they go directly into the garden, then I till the leaves and manure into the soil. I had so many ground leaves in the garden a couple of years ago, the tiller couldn't reach dirt. But, I did my best at getting some dirt mixed in with the leaves, and by planting time the leaves were all gone – no harm done." Marc P.

"I double dig an area about 4' wide and 1' deep, place the soil to the side of the row. I then turn over a shovel depth by hand with a good shovel. I place shredded material: horse manure, shredded leaves, humus from the woods, shredded straw, compost, grass clippings, or anything I can get cheap that is pure organic, in the row. I mix whatever I have the best I can. I fill the rows a little at a time through to the end of November, and pack down the organic material as I go. I cover it with the good soil that I had placed to the side of the row, then mulch with compost. I till everything, plant winter rye or mustard mix, and let it sit over the winter." Don C.
"At this point in my life, I'm getting lazy – I've done this so many times in the past. I use so many leaves, people call me the "bag lady." I drag hubby along, and we hunt up leaves that are already shredded. Next, we go to the municipal compost heap. The compost has been sitting there more than a year and its nice and black. In fact, the last batch had worms in it. I purchase composted cow manure as well. In the fall, I triple dig, smooth out, then make a trench all along where I'm going to plant. I add the shredded leaves, compost, cow manure, and crushed egg shells that I have saved all year. I also add some peat moss, my own compost, fish scraps, and whatever will break down properly, along with some 5-10-5 to help break all this down. I also give a fine sprinkle of lime since New Jersey soils are usually on the acid side. I don't forget the magnesium either, which is deficient here in our area. I water this all in, and top with soil. Then, I cover this with 3 inches of chopped leaves, and a piece of clear plastic to "cook it" during the winter. In the spring, I do a pH test, adjust, and it's ready to plant." Minnie Z.
"Three days before I put my tomatoes out, I'll take a 5 gallon bucket, and at each planting spot, I'll dig out enough soil to fill half the bucket. I'll fill the bucket the rest of the way up with potting soil and mix in some mycorrhizal fungi. After this, I'll take two more shovels of soil out of the planting hole and pour the mixture in the 5 gallon bucket back into the planting hole. After I've done all my sites, I'll go back and drive rebar stakes (I use 10' sections of 1/2" rebar as tomato stakes). Then, I drench the entire patch with manure tea made from fresh manure and water. Four days before I put my plants in the ground, I'll spray them with Hytek Polymer (an anti-transpirant) to help with transplant shock, again at two days, then again at planting. After all plants are in the ground, I'll soak them with a diluted mixture of manure tea. That's it." Paul H.
"Soil for growing tomatoes should be deeply dug and have plenty of humus incorporated into its structure." Bernard Lavery
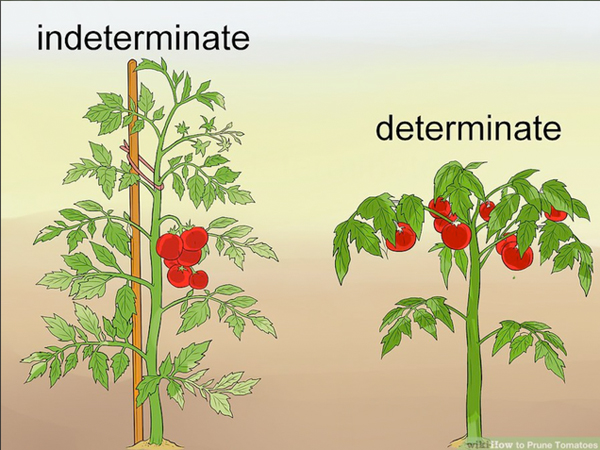
Indeterminate vs. Determinate Tomatoes?
Indeterminate tomatoes are tomatoes whose vines actually continue growing until they are killed by frost. Also referred to as "vining" tomatoes, indeterminate tomato varieties will continue to set and ripen fruit throughout the growing season. The blossoms and fruit develop progressively as the vine grows, so tomatoes, in all stages of development, may be on the vine at one time. Harvest can last for several months. Indeterminate plants can reach heights of up to 10 feet although 6 feet is considered to be the norm.
Determinate tomatoes are varieties that grow to a fixed mature size, usually no more than 4 feet. The plant is self-topping and seldom needs staking. They are often referred to as "bush varieties." All of the blossoms and fruit develop on the plant at about the same time. Then, they ripen in a short period of time, usually about 2 weeks. Once this fruit has ripened, the plant begins to diminish in vigor and finally dies.
"Select proper site for garden and half the work is done."
— Old Chinese saying.